Tutorial 04: Landscape-scale fire potential
Tutorials 01 - 03 involved modeling transient fire spread from a point ignition. ELMFIRE can also quantify landscape-scale fire potential (i.e., spread rate, flame length, etc.) assuming each pixel burns as a head fire in a manner similar to FlamMap. In Tutorial 04, we assess how wind speed affects landscape-scale fire potential in part of California’s Central Sierra that includes areas burned in the 2013 Rim Fire.
As in Tutorial 03, LANDFIRE
2.2.0 fuel and topography inputs are are obtained from Cloudfire’s
fuel/weather/ignition microservice. These are used in combination with
idealized spatially uniform wind speed/direction and fuel moisture
meteorological inputs as specified in the wx.csv file:
ws,wd,m1,m10,m100,lh,lw
0,0,2,3,4,30,60
5,0,2,3,4,30,60
10,0,2,3,4,30,60
15,0,2,3,4,30,60
20,0,2,3,4,30,60
25,0,2,3,4,30,60
In Tutorial 02 and
Tutorial 03, each row in
wx.csv corresponded to a different time. Here, each row can be
thought of as specifying different combinations of spatially uniform
wind and fuel moisture conditions to drive fire potential calculations.
There are six different combinations of input parameters with all inputs
held constant across combinations, with the exception of wind speed
which is varied from 0 mph to 25 mph at 5 mph increments. Therefore, a
total of six separate fire potential calculations will be conducted when
Tutorial 04 is executed:
cd $ELMFIRE_BASE_DIR/tutorials/04-fire-potential
./01-run.sh
The 01-run.sh script sets up and runs ELMFIRE, including creating
multiband meteorological input rasters from the inputs specified in
wx.csv. Recall that ELMFIRE does not directly read the wx.csv
file - instead it reads the rasters that are created by 01-run.sh.
Comparing input/elmfire.data from Tutorial 03 and Tutorial 04 shows some
differences in the &SIMULATOR namelist group. Tutorial 03 had this`` &SIMULATOR`` namelist
group:
&SIMULATOR
NUM_IGNITIONS = 1
X_IGN(1) = 740548.710
Y_IGN(1) = 4147156.024
T_IGN(1)      = 0.0
/
which, in Tutorial 04, looks like this:
&SIMULATOR
MODE = 2
/
ELMFIRE has two primary modes of operation. The first, and default, is
MODE=1 which directs ELMFIRE to run a transient simulation of fire
spread across a landscape as in the first three tutorials. Setting
MODE=2 as above directs ELMFIRE to burn every pixel on the landscape
as a head fire similar to FlamMap.
Other differences between Tutorial 03 and 04 include elimination of the
&TIME_CONTROL namelist group (since time step, CFL number, and
simulation stop time are not relevant) as well as modifications to the
&MONTE_CARLO namelist group which now reads:
&MONTE_CARLO
METEOROLOGY_BAND_START                   = 1
METEOROLOGY_BAND_STOP                    = 6
METEOROLOGY_BAND_SKIP_INTERVAL           = 1
/
This directs ELMFIRE to start in ws.tif, wd.tif etc. with
METEOROLOGY_BAND_START (which in this case is 1) and conduct fire
potential calculations. ELMFIRE will then increment the meteorology band
by METEOROLOGY_BAND_SKIP_INTERVAL and conduct fire potential
calculations for the next meteorology band. This continues until
METEOROLOGY_BAND_STOP is exceeded.
In this case, six separate fire potential calculations (corresponding to
wind speed = 0, 5, 10, 15, 20, and 25 mph) are conducted. Outputs (flame
length and spread rate) are written to the outputs folder with the
meteorology band number appended to the quantity name before the
.tif suffix. For example, head_fire_flame_length_001.tif
corresponds to the first meteorology band (wind speed = 0 mph), and
head_fire_flame_length_006.tif corresponds to the sixth meteorology
band (wind speed = 25 mph).
A couple notes:
1. Wind and slope are not assumed to be aligned, meaning wind direction affects potential fire behavior. Running fire potential calculations for the same landscape varying only wind direction will give different results, with the highest spread rate and flame length occurring when wind and slope are aligned, and the lowest occurring when they are opposed.
2. By default, modeled spread rate and flame length include the effect of crown fire. Crown fire can be disabled by adding the keyword
CROWN_FIRE_MODEL = 0to the&SIMULATORnamelist group. Currently, only one crown fire model is implemented and it is disabled by settingCROWN_FIRE_MODEL = 0and enabled by settingCROWN_FIRE_MODELto any value greater than 0.
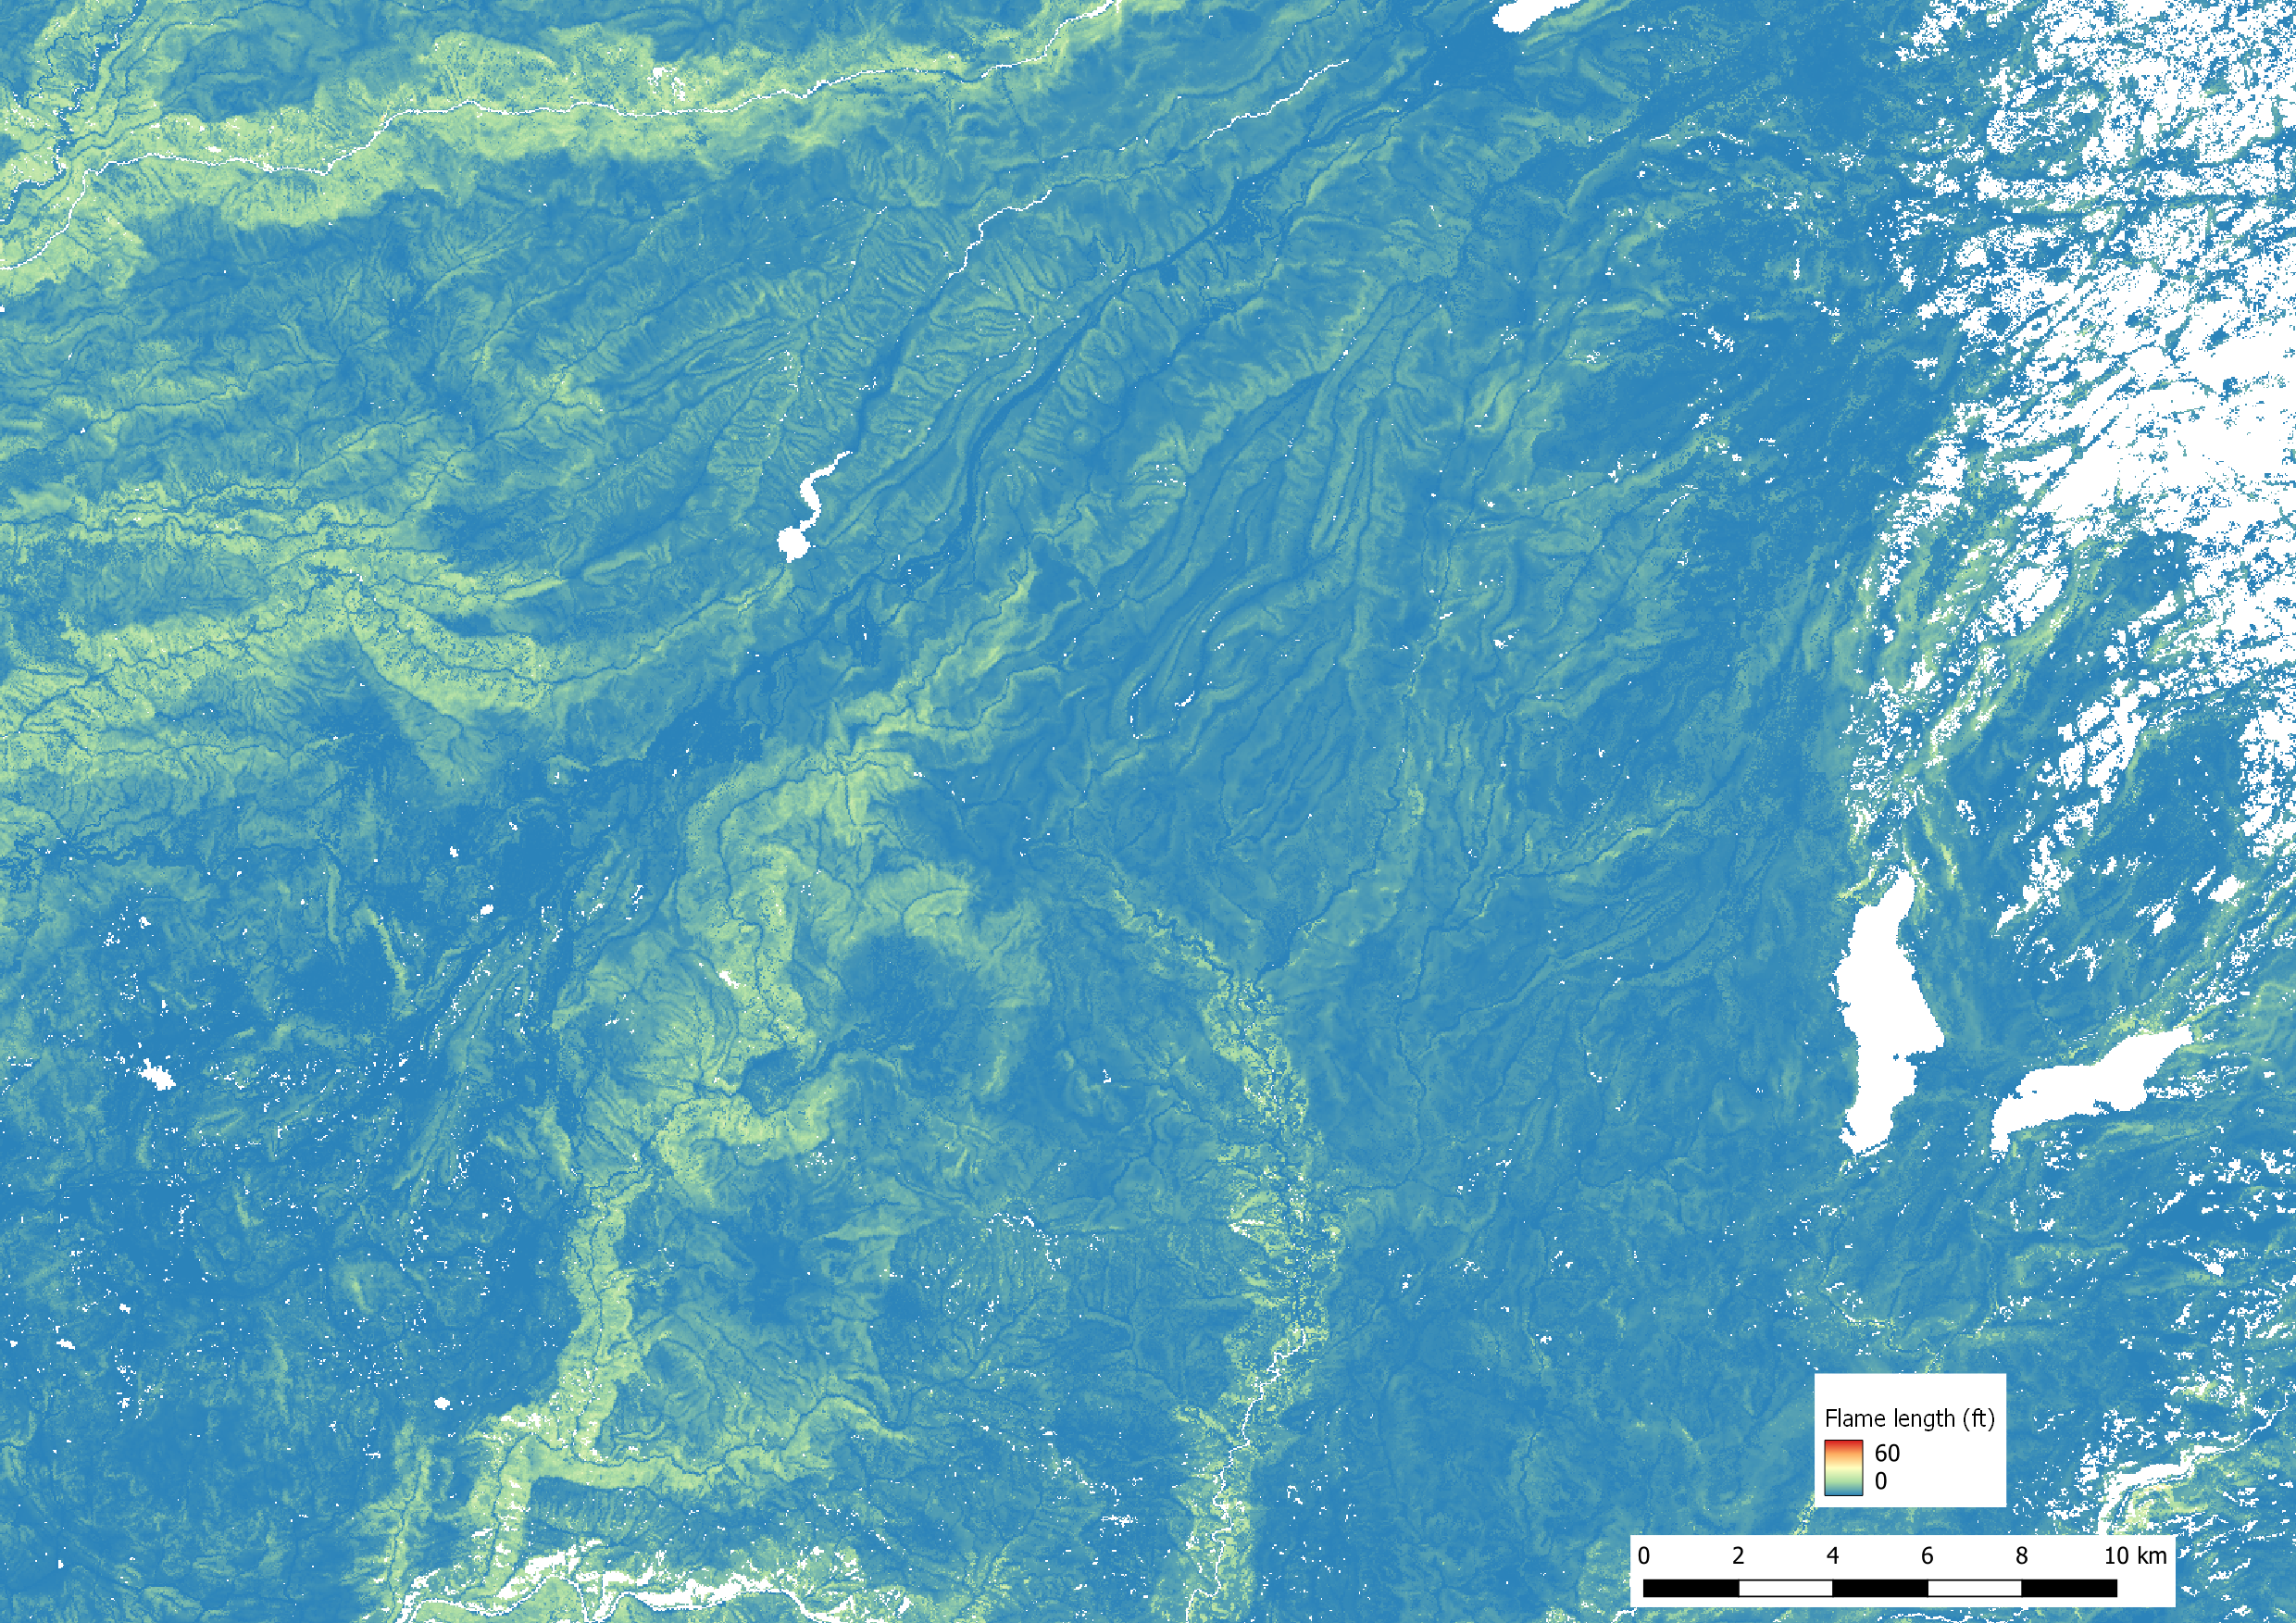
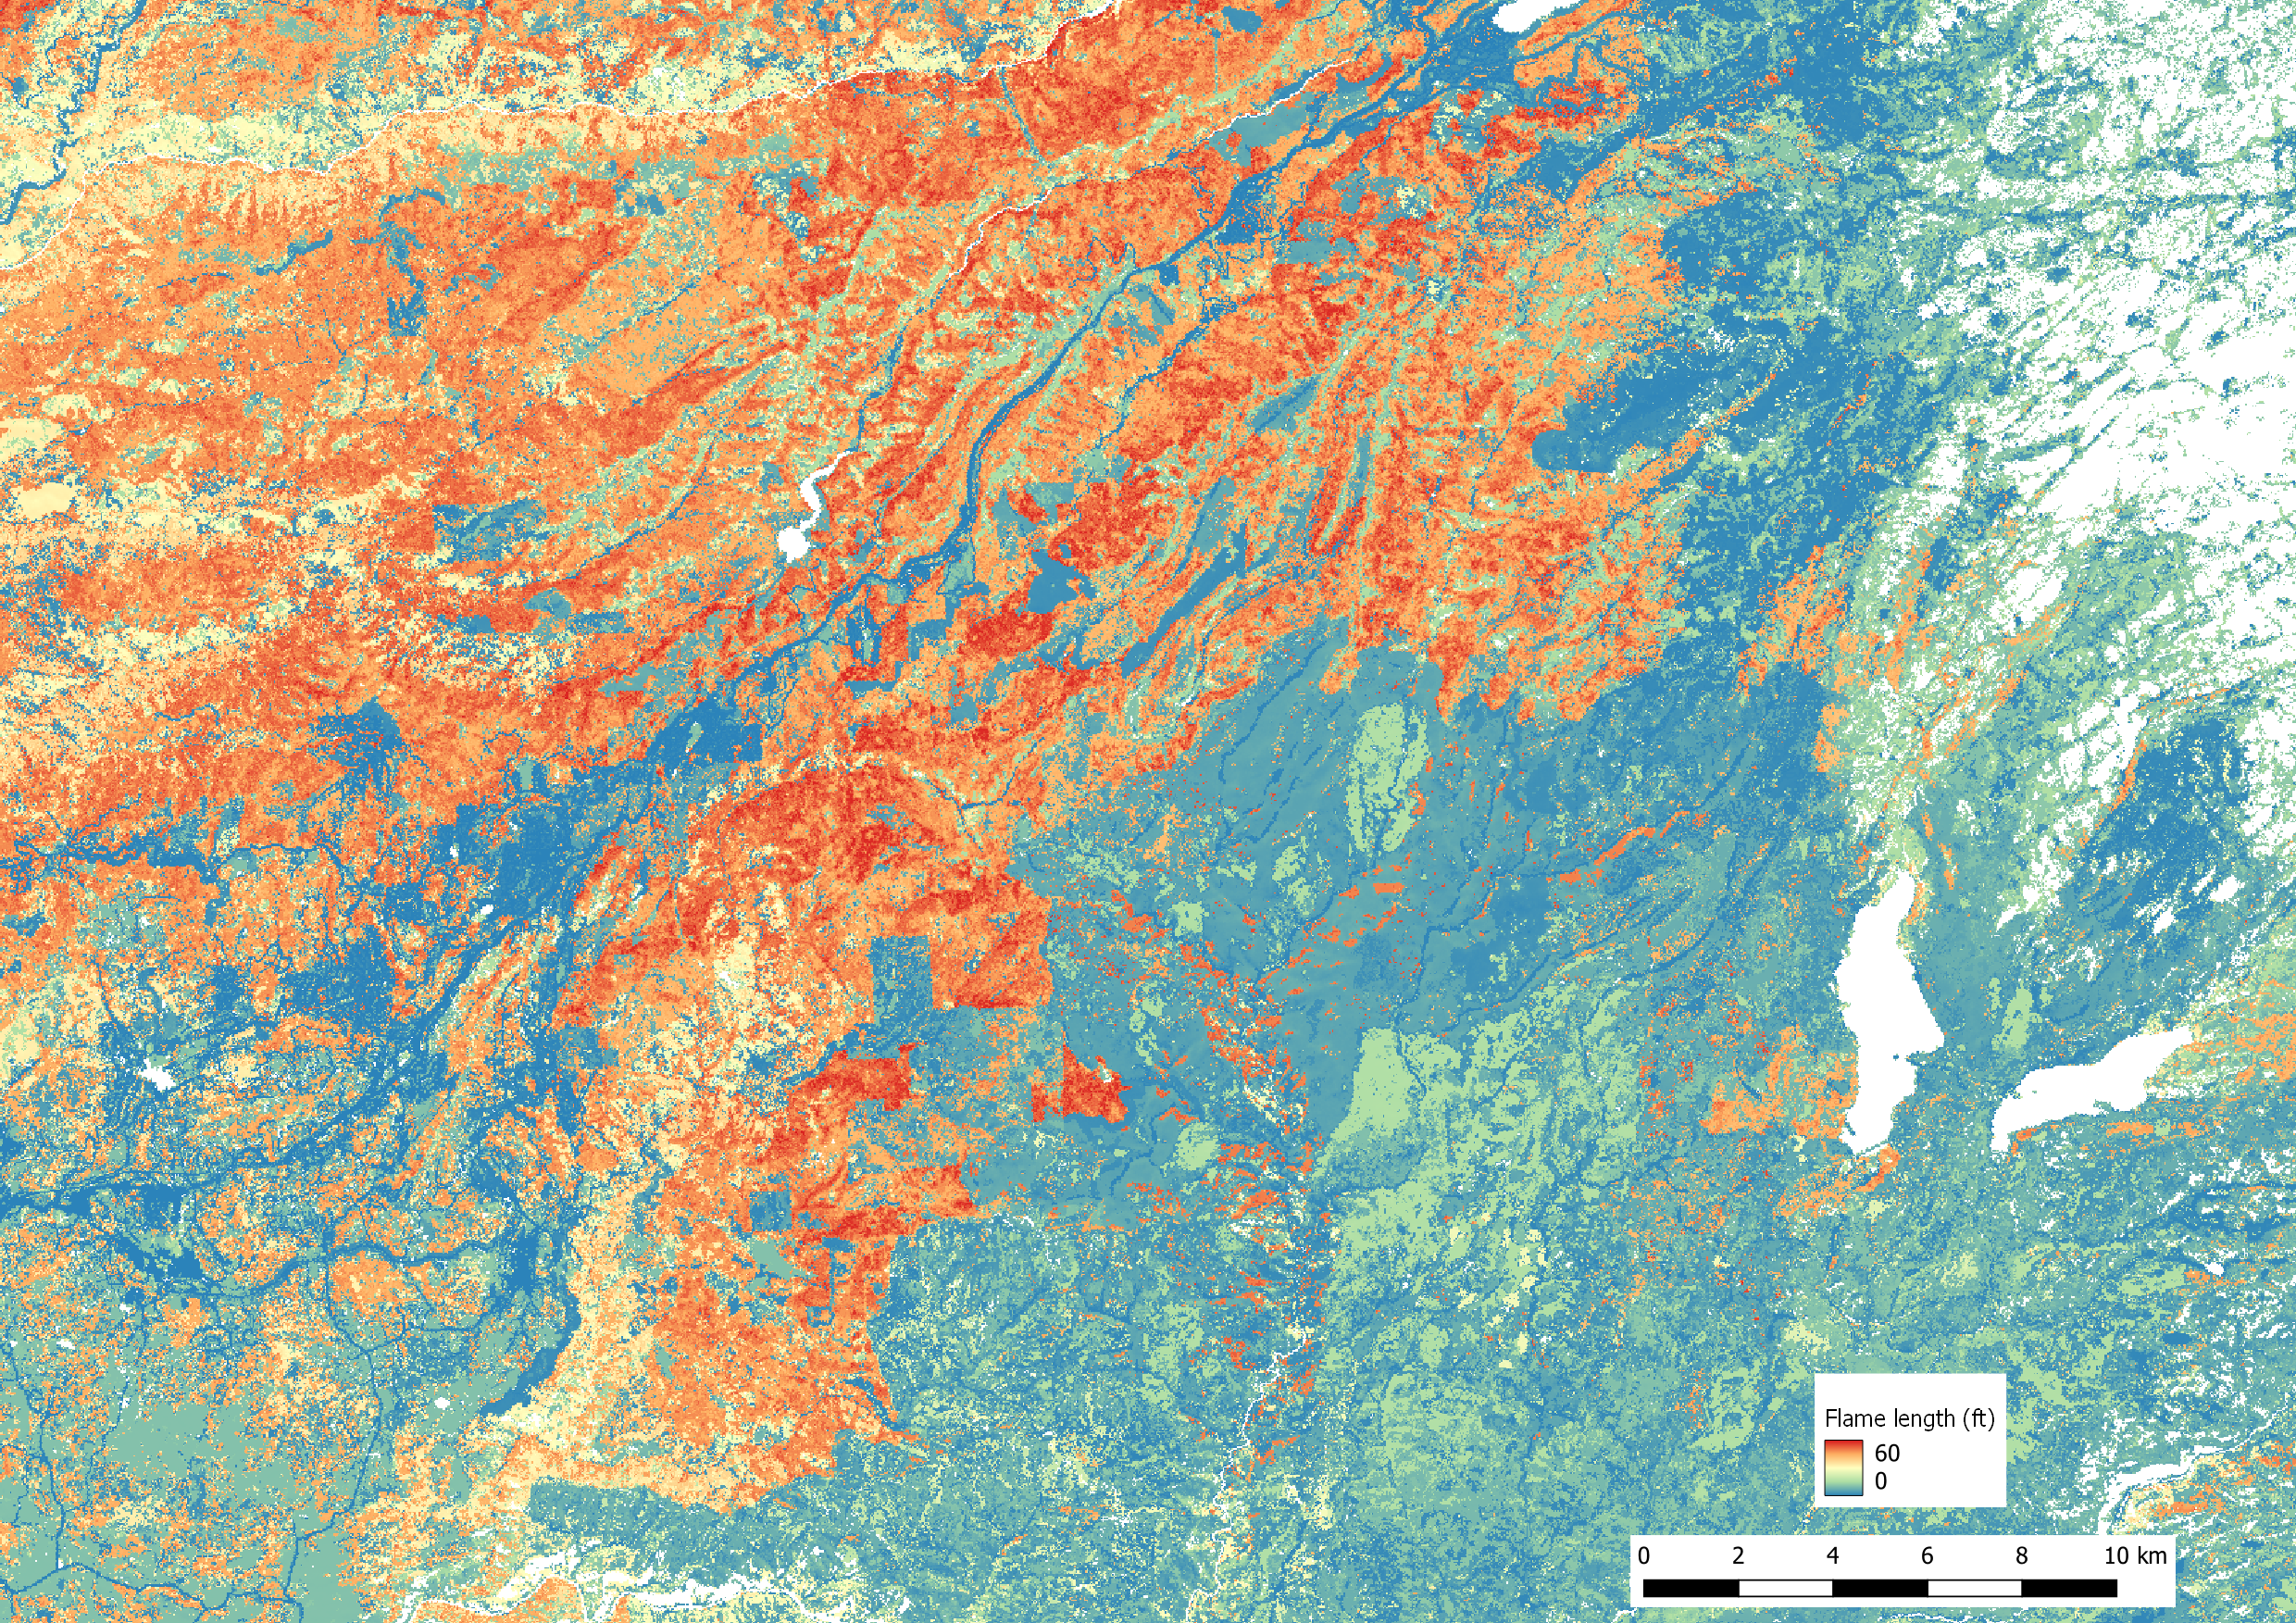
Potential flame length is shown below for the 0 mph (top image) and 25 mph (bottom image) cases.